

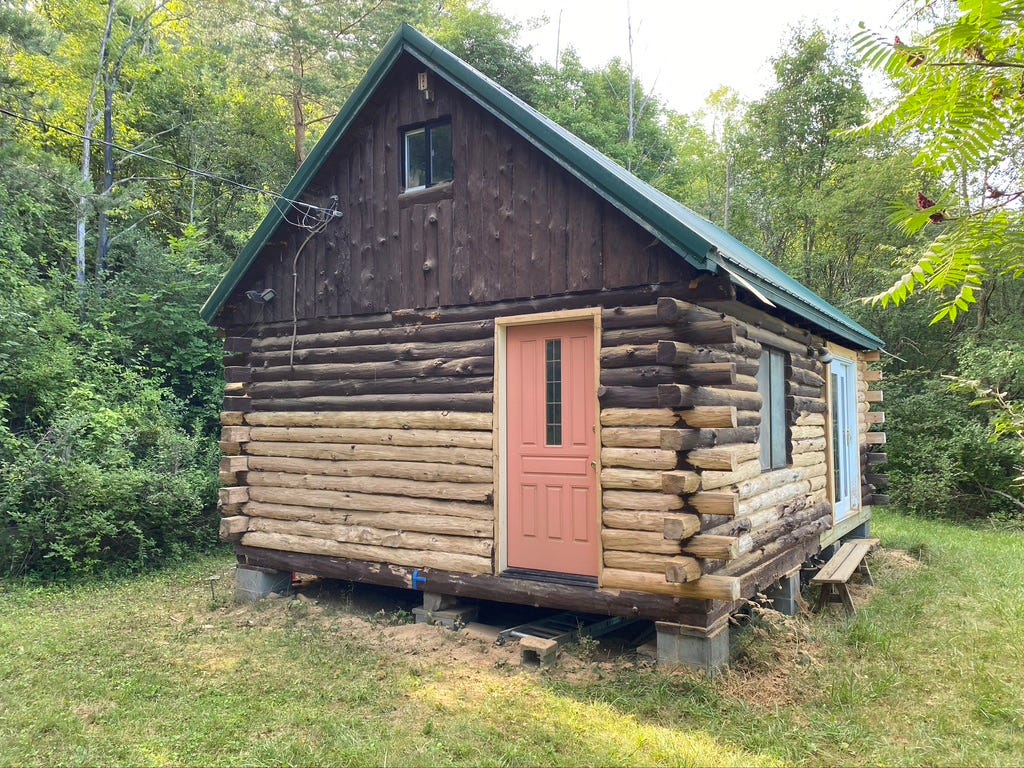
Stripping and Staining the Cabin
Stripping and Staining the Cabin
Start to finish, see a month of progress in a minute!

For the past few weeks, we’ve been getting up at sunrise to work on the cabin before our day jobs. I was trying to squeeze this whole project in before we leave New York this week. It’s been pretty intense. Luckily, we wrapped it all up on Sunday and it’s rained every day since then.
If you want to see all that work compressed down into a minute, you can watch the video, also linked at the end of the post. It’s a very satisfying summary.
The Problem 🐝🏚️
Well, there’s carpenter bees living in the logs. They burrow a few inches into the wood and cause all sorts of issues with rot. I love bees and all - they are welcomed on any tree on the property. But the one spot I don’t want them to nest seems to be their favorite.
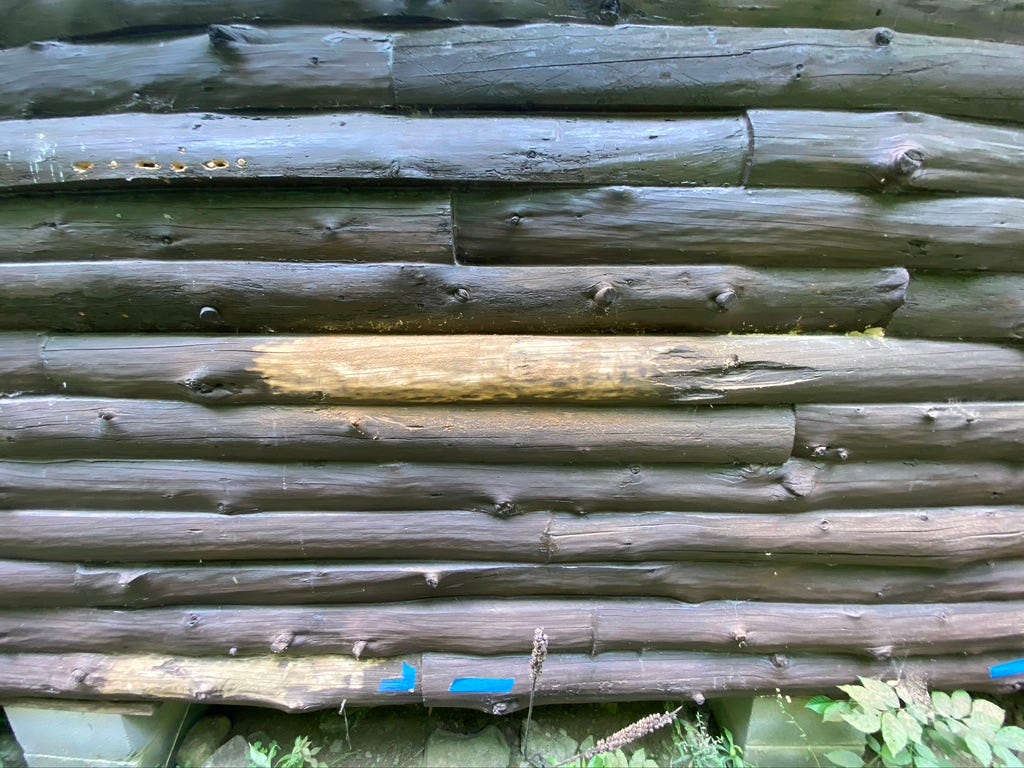
I’ve been plugging the holes for a few years now. The real solution to keep the bees away is a fresh coat of stain and some anti-bug treatment on the logs. That’s what kicked off this whole process of restaining.
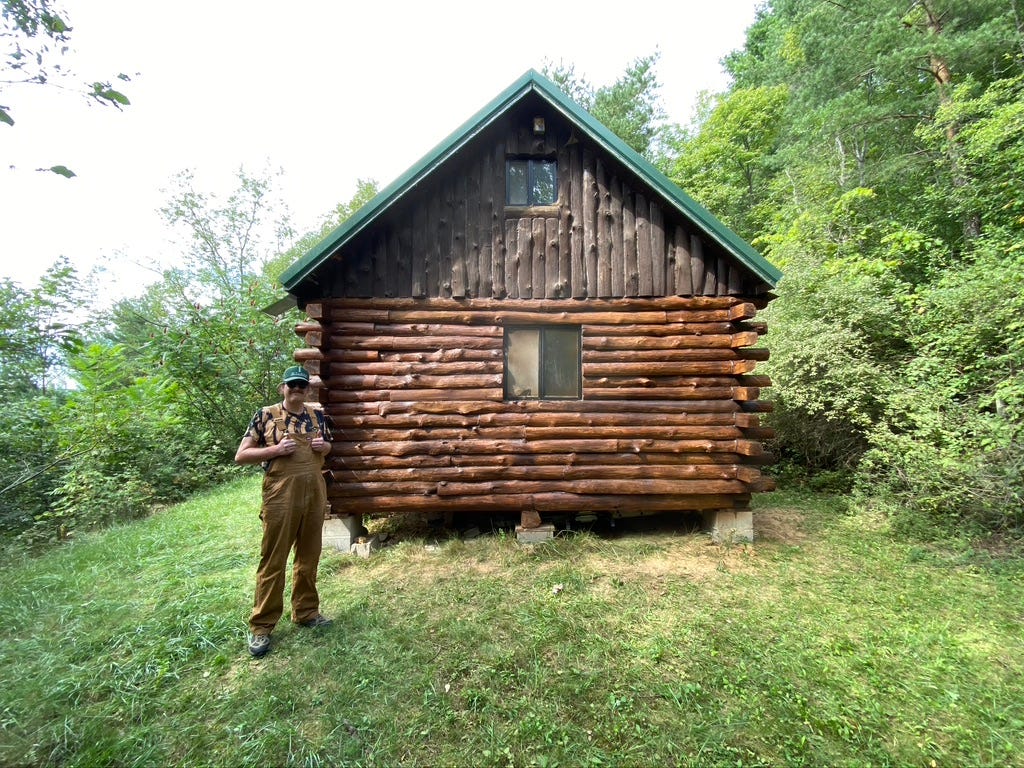
Stripping The Old Stain Off The Logs
The existing stain was dark brown and covered up the wood grain entirely. To do things properly, we had to strip the logs back down to raw wood and apply a fresh coat of stain. The stain will only properly adhere to the wood if it’s bare. That means resurfacing the logs, inside and out.

On the first Sunday we set aside to work on the cabin, my dad and I pulled down the driveway and heard a clap of thunder. The skies opened up and so we decided to sand the interior instead. The mice had left some gnarly stains in the wood when nesting behind the old walls. Resurfacing it made a huge difference! It smells like pine instead mouse. I’ll eventually be staining the interior logs with a lighter whitewash to brighten it up.

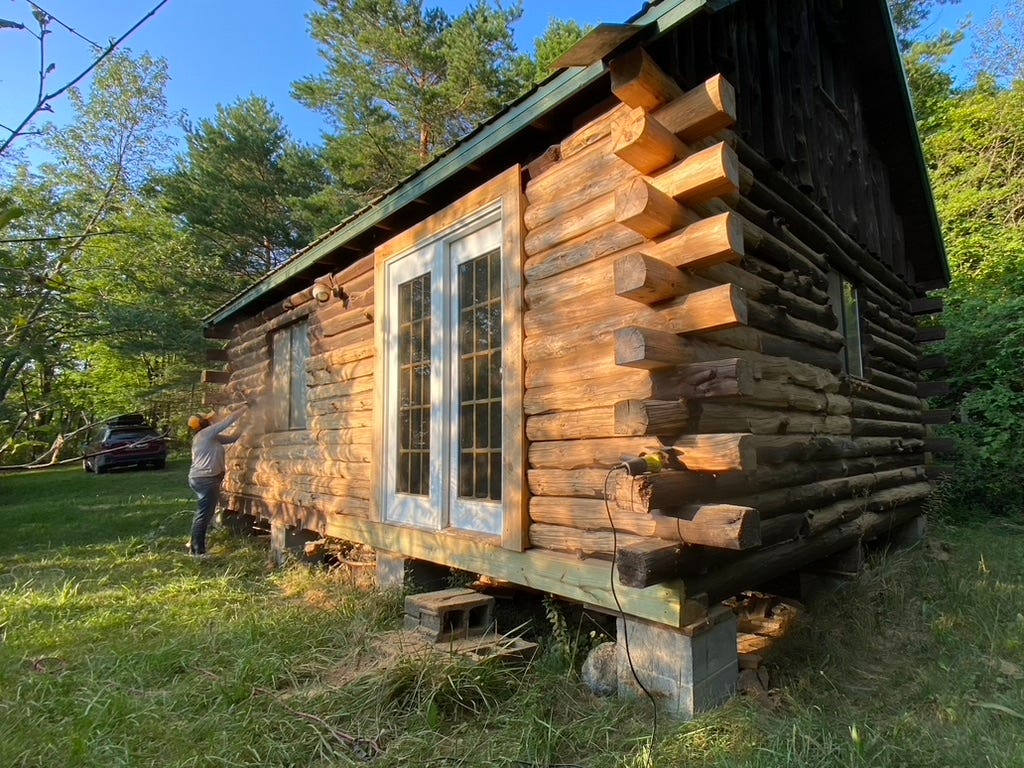
Working in 2 hour shifts in the mornings with two people, we stripped the whole cabin in about 15 hours of work. A lot of branches and knots were left exposed in the logs outside, which gives the cabin a ton of character. We used angle grinders with 25 grit sanding pads. It wasn’t a simple process to sand around branches.
We ran out of time to do more fine detail work with 60 grit pads, but the logs are looking really good over all. This is the one time (hopefully) I’ll be doing this sanding step. In the future, I’ll just need to clean and seal the logs. Turns out log cabins require lots of maintenance. I’ve learned a lot so far.
I also have to say, I couldn’t have completed this work without Sarah and my parents helping sand and Derek staining! My deepest gratitude to you all.
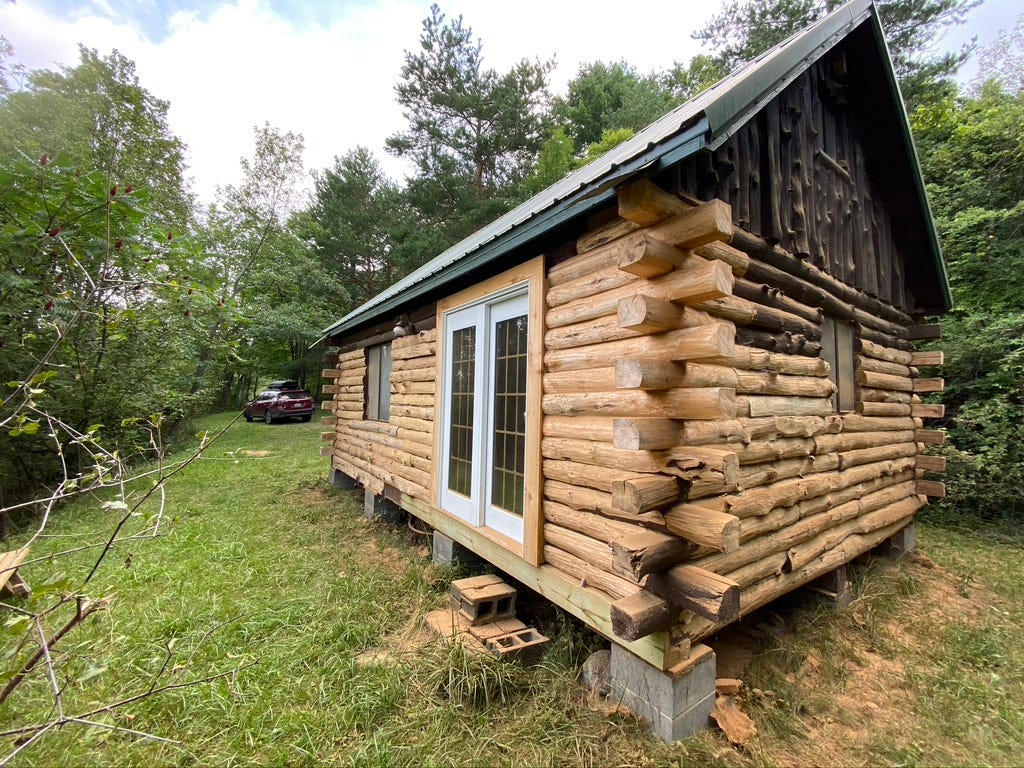
Staining in a Day!
The biggest relief came on the day of staining. Derek and I had a paint sprayer, which was a miracle. In the timelapse below, it looks like the stain goes up instantly. It took us about 4 hours and that was the last thing to do before we leave New York this week. Now the logs are protected from the rain and the bees.

What’s Next?
I have the Log Repair Folks coming for a second (and final) trip in October. They’ll replace the last rotten logs. Once that’s done, I’ll stain those new logs to match. I’ll also apply a clear coat over the entire cabin before winter. There are still the peaks to sand and stain, inside and outside. That should wrap the exterior work.
The list of “what’s next?” is almost infinite. There’s plenty of work to do. I’ve got to replace the subfloors, flooring, windows, install and connect electric, dig a well and build a patio. There’s an orchard to clear and plant. There’s views to clear and gardens to plant. You get the idea.
This whole project isn’t about getting it done. It’s a process to be enjoyed along the way. I feel great about the dedicated progress we made this month. At the same time, I’m ready to relax a bit and pick up smaller projects in the fall.
If you want to keep in the loop about all that, please consider subscribing.

Hey! If you’re new here, this is West Bluff Food Forest. I'm building a permaculture orchard and cabin home in the Finger Lakes region of New York. I write about the lessons I'm learning and update you along the way.