

How To Save An Old Log Cabin🏠
How To Save An Old Log Cabin🏠
Lessons Learned Fixing the Cabin and Progress in 2021

After three years of work, I’m finally confident this cabin will stay standing. I’ve put time and effort into repairing this cabin instead of tearing it down and starting over. I think it’s worth it. I’ve had tons of help from family.
In this post, I’ve got some progress pictures to show you. I’m also sharing what I’ve learned about repairing and maintaining a log cabin. Spoiler: it’s a bit more complicated than a regular ol’ house.
Fixing Rotten Logs
Hire A Professional
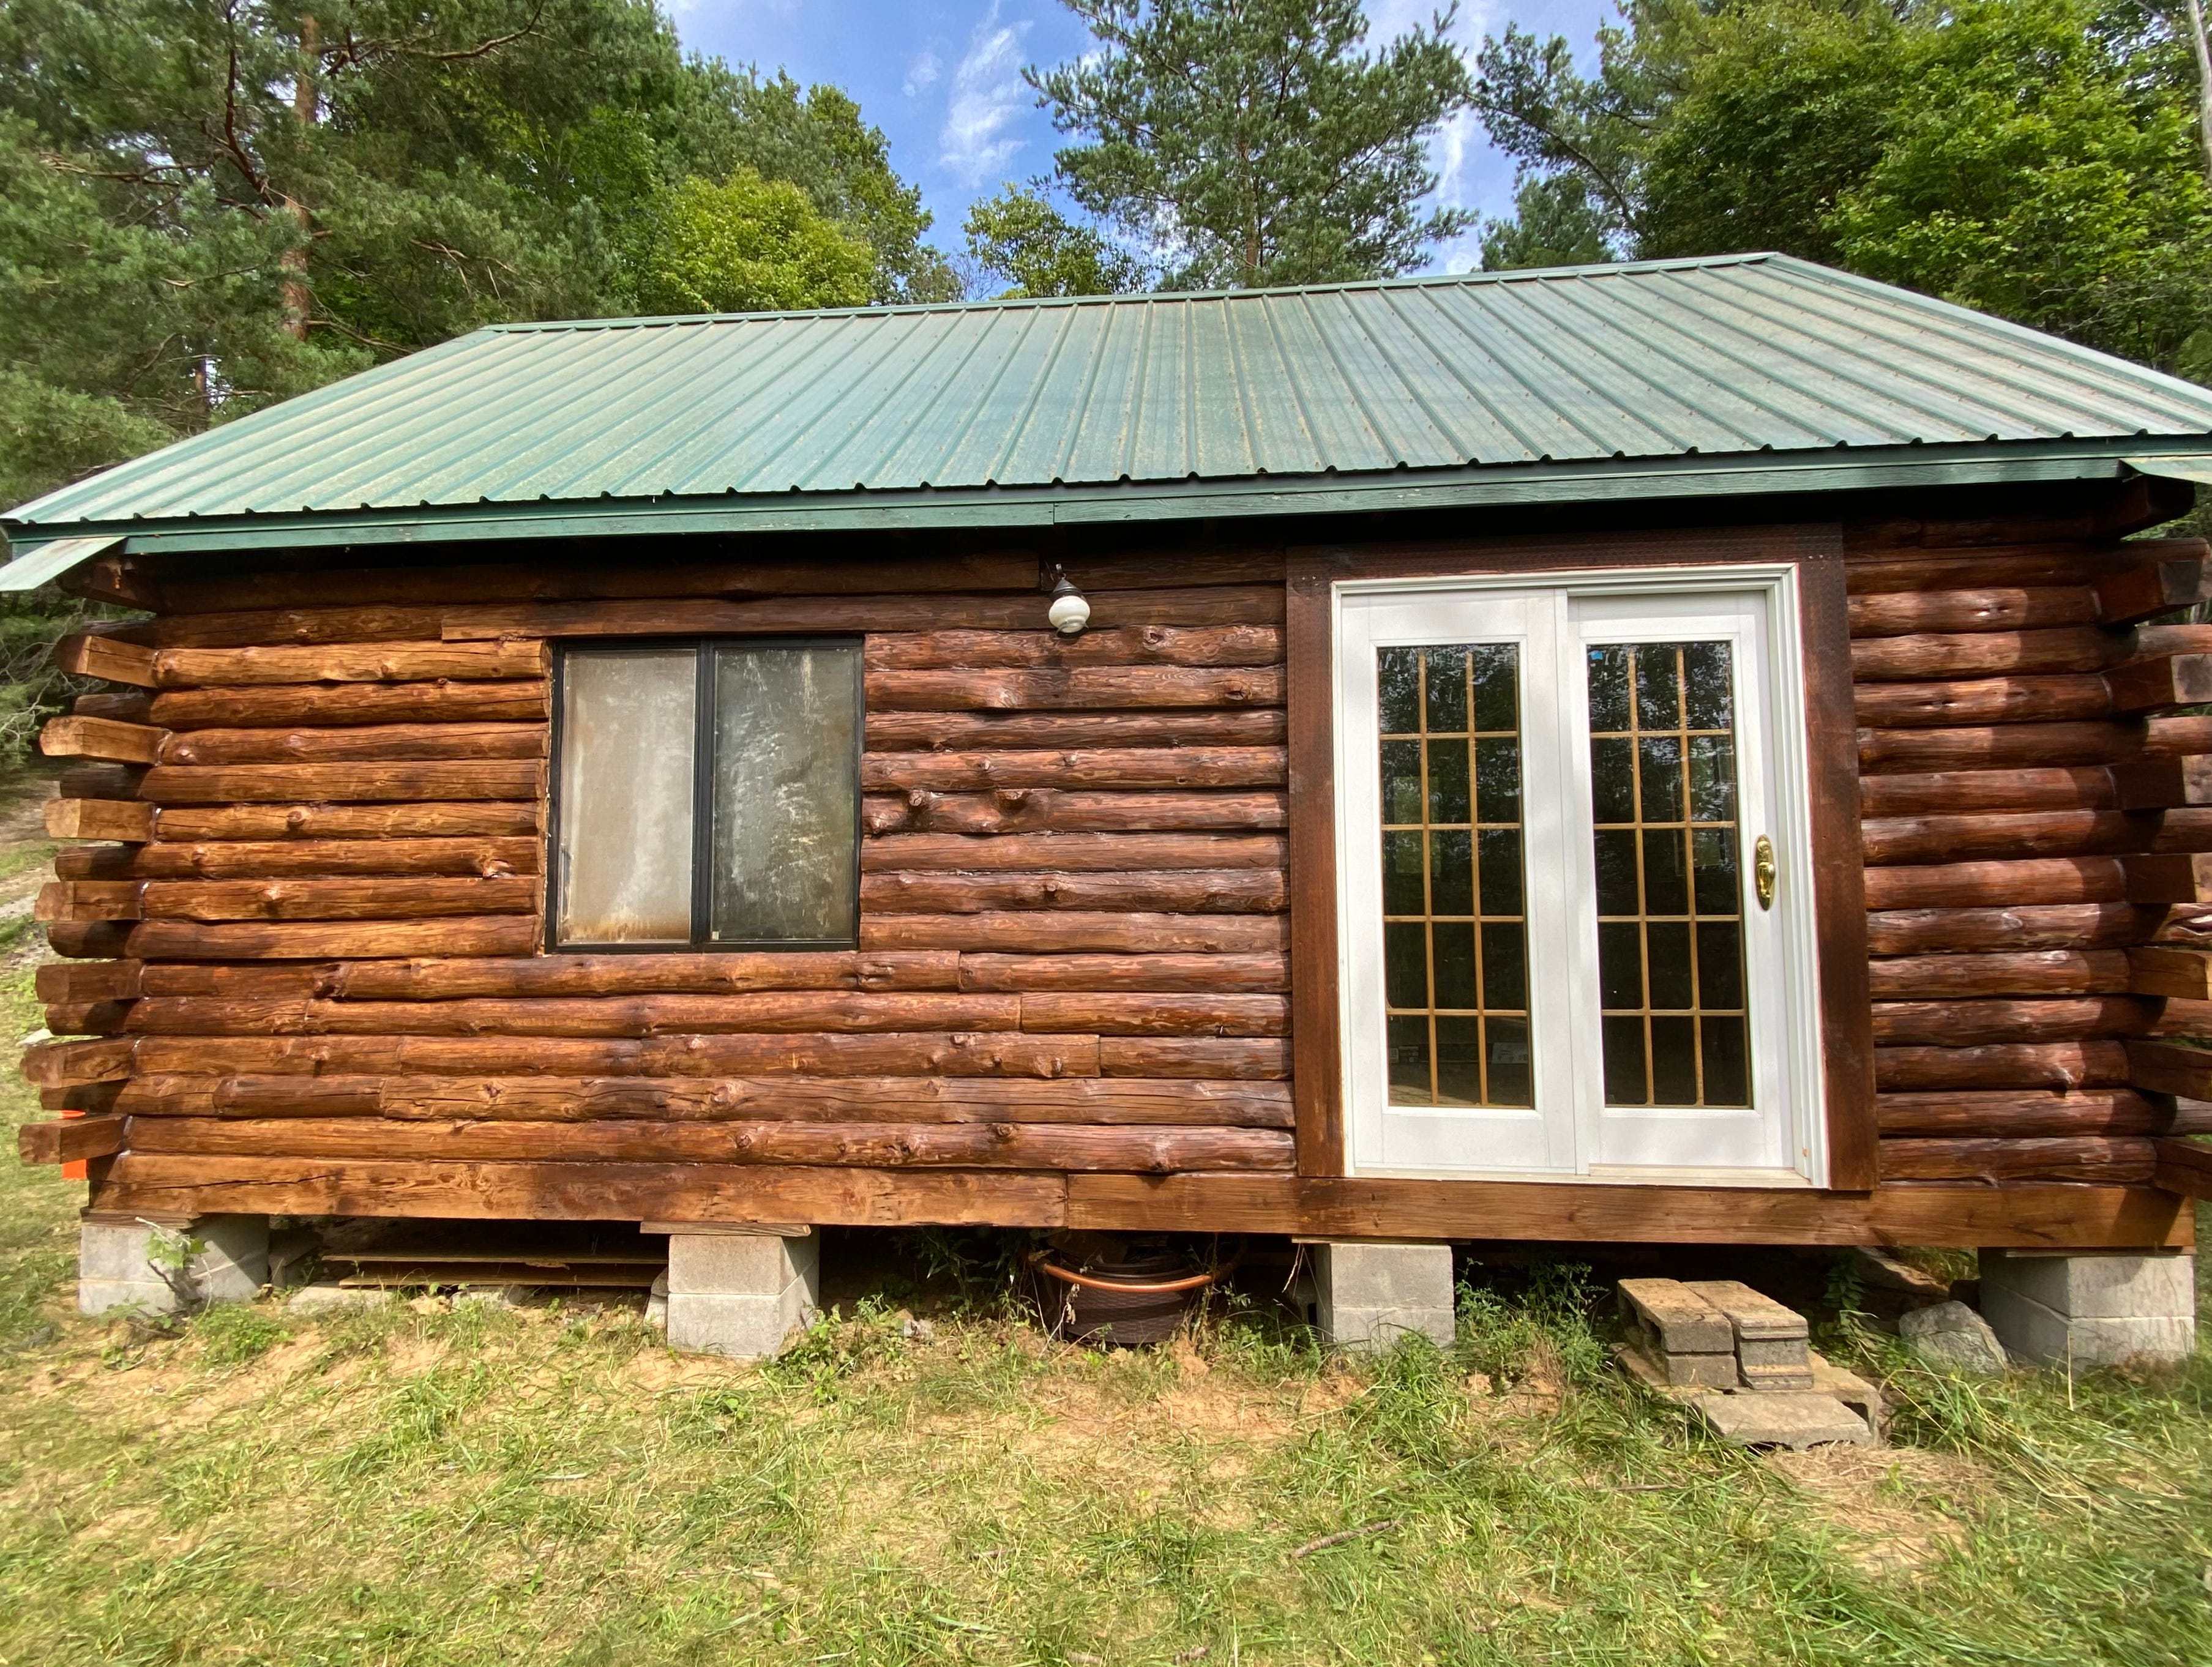
This is a job that is absolutely worth hiring professionals. Over the course of two trips (which I’ve already written about here) a team of two fixed about 200 feet of rotten logs on the cabin. They rebuilt an entire corner and replaced rotten logs below doors and windows.
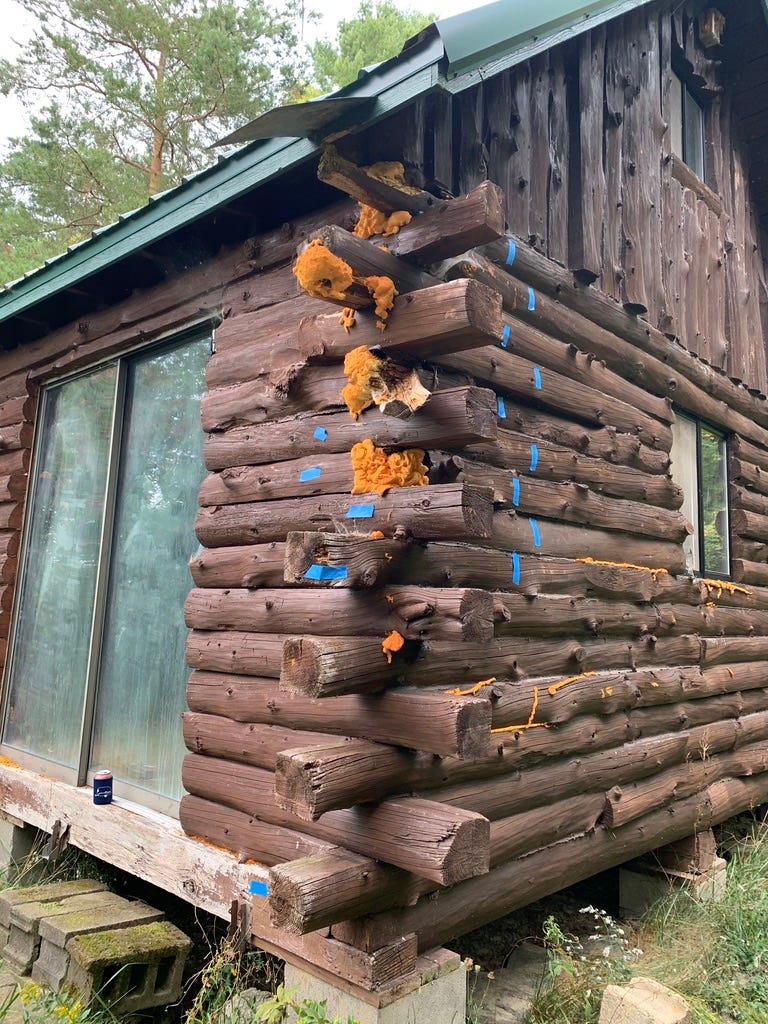
This work took them about 4 days over two trips. They cut out the rotten wood and shaped the new logs to match the original structure. Then they screwed in the new half or full log and sealed it into place. Had I tried to do this myself, it would have taken me weeks and looked like rubbish. Check out how good it looks now!
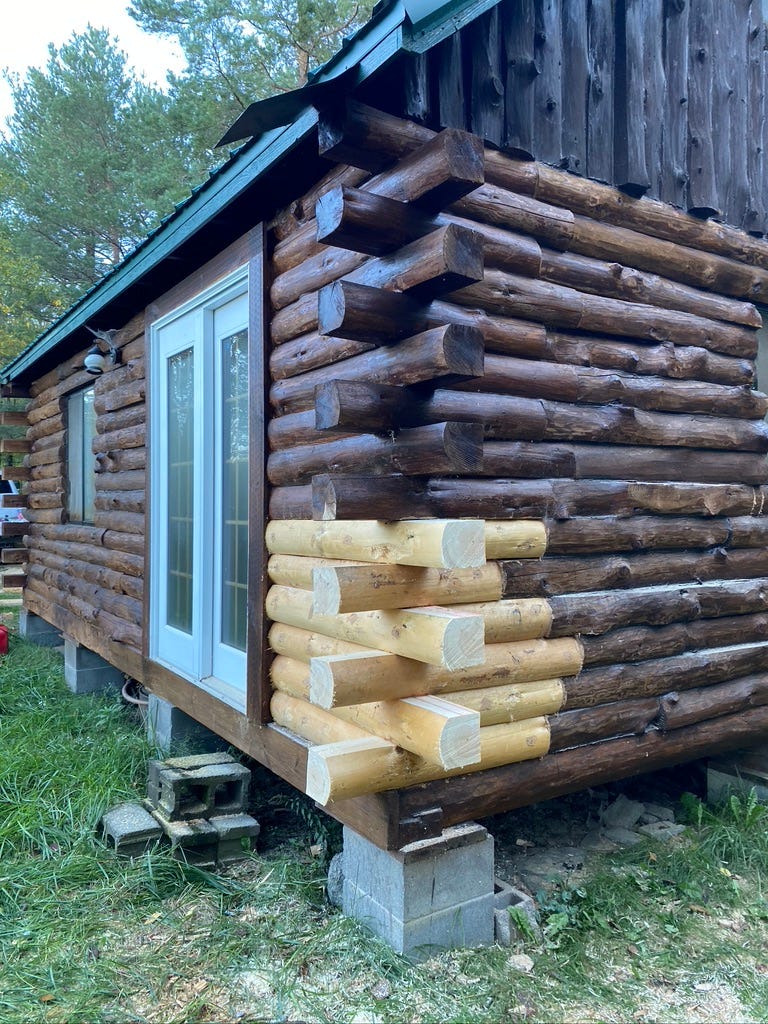
Simply said, it’s worth paying skilled folks to do this right. With their help, this cabin has a second shot at life. Check out American Log Restoration if you need logs replaced on your cabin. I’m not paid to say that by the way. In fact, I’ve paid them a pretty penny. Worth it.
Sanding Logs
Do It Yourself
For a fresh coat of stain to properly adhere, it needs to go over bare logs. That meant we had to sand the old stain off the cabin before I could put the new stain on. Sanding also helped the newly replaced logs blend right in with the old ones.
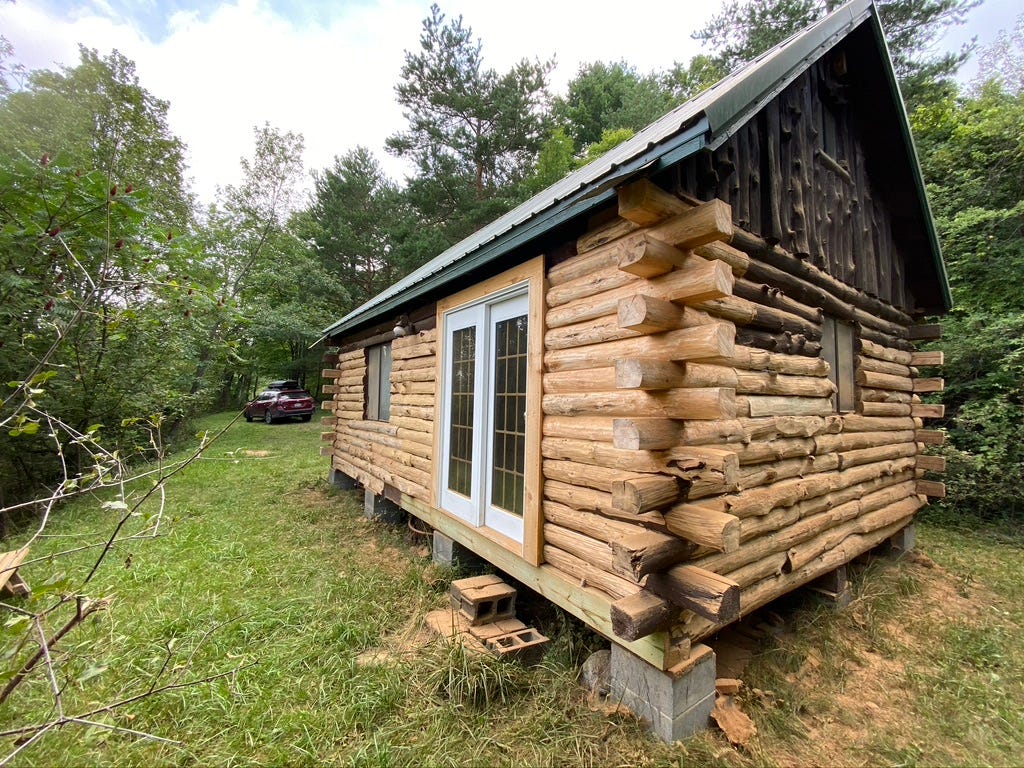
Hopefully you won’t ever have to do this project. I won’t rehash the saga of stripping and staining the cabin here, but know that doing it right requires proper tools and many hours of work.
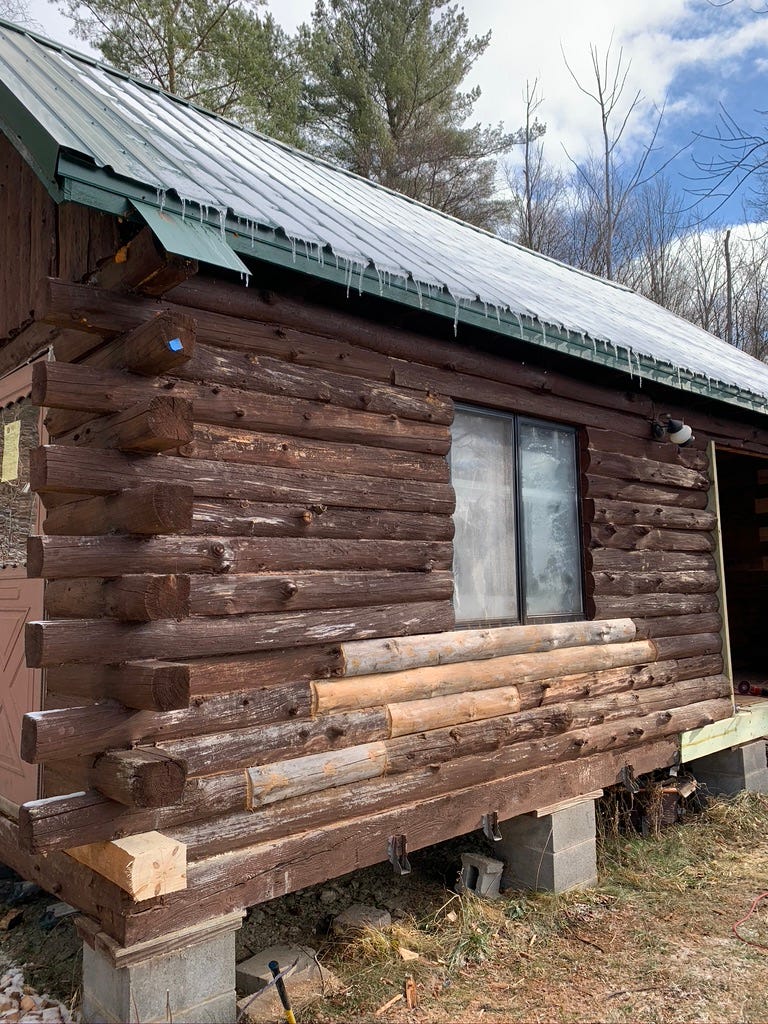
Three years from now, I’ll add another coat of sealant. If the stain fades in seven years, I can stain over that with the same color. I’ll be glad to never repeat this whole process. But I do know how to do it and have the right tools.

Speaking of tools, one thing I didn’t note in that prior post is the specific tools we used for this project.
Two sanding-pad backing plates (like this)
25 Grit Sanding Pads (each one lasted about 15 minutes)
60 Grit Sanding Pads (if you have the time for touchups)
Face mask (you have some of those, right?)
Leather Gloves
Eye protection
Ear protection
A generator for electricity
Staining and Sealing Logs
Do It Yourself
The log stain I used is called Lifeline Ultra-7, which is a single-coat stain by Permachink Systems. It protects the bare logs and still shows the grain pattern. This color is called Chestnut.
We used a Wagner Paint Sprayer to apply it and paint brushes to back brush. We all watched this video to brush up on technique. Yes, that was a pun, thanks.
We sealed the ends of every log on the corner with Log End Seal and the logs with Lifeline Advance Log Finish. I filled in gaps with Energy Seal Caulk, which is what the log repair folks recommended.
All together, these supplies cost about $1300. When comparing it to the cost of hiring someone to do this work (the internet says $10-15K) this was worth doing myself.
Off Grid Property Monitoring
To keep an eye on my cabin, I also got a Vosker V200 camera this year. It has a solar panel and 4GLTE connection to transmit photos in real time to my phone. I also got a lockbox to keep it safe, though the thing has GPS so no one could really steal it.

So far, I haven’t been impressed with this camera. I’ve called their support line five times, reformatted the SD card a bunch, had to buy an antenna extension for the signal to be strong enough to send photos… overall I’m not sure it’s worth the money. Oh well.
How Far We’ve Come!
Well that’s a wrap for 2021 projects. The road to the cabin has not been passable for much of November because of all the rain. Soon it will be covered in snow. But right now, it looks like this.

Next year my focus will be on planting trees and replacing the cabin floor and windows. Subscribe below if you want to read about those updates. As always, thanks for reading.

Hey! If you’re new here, this is West Bluff Food Forest. I'm building a permaculture orchard and restoring a cabin in the Finger Lakes region of New York. I write about the lessons I'm learning and update you along the way.
Hey Lucas! The cabin looks wonderful! Your patience and fortitude(also the names of the lions who grace the plinths of the NYC library) is being realized! Thanks for sharing your journey. Happy 🦃